With Visual Studio Express for Web being free and Windows Azure providing you with a trial run -You have every reason to try it now!
Microsoft also has MVA (Microsoft Virtual Academy) which is also free to sign up to. As of writting .NET developers in UK are in high demand and come with highly paid positions. So if you are already here you clearly are trying to decide what to do. I will try to show you how to start using Azure in the simplest way.
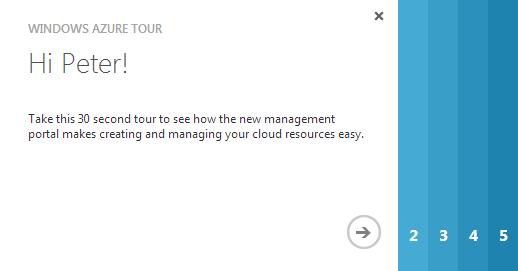
First of all you need to grab a Free Trial Account which only takes a few minutes to create. Once you have completed this you need to go to manage.windowsazure.com - That is the "control panel" and we will be using this very often. The first time you will get a quick tour.
With the hype around the Cloud I decided to demonstrate Azure Cloud Services. Daily we use many instances of Cloud Services so it is worth learning about it. With a trial we get 750 compute hours for Cloud Services.(A month free for Small but you get more with Very Small) Here is a quick list of advantages of using Cloud Services.
So right after the introduction you will land on a create panel. Click on Compute -> Cloud Service -> Quick Create.
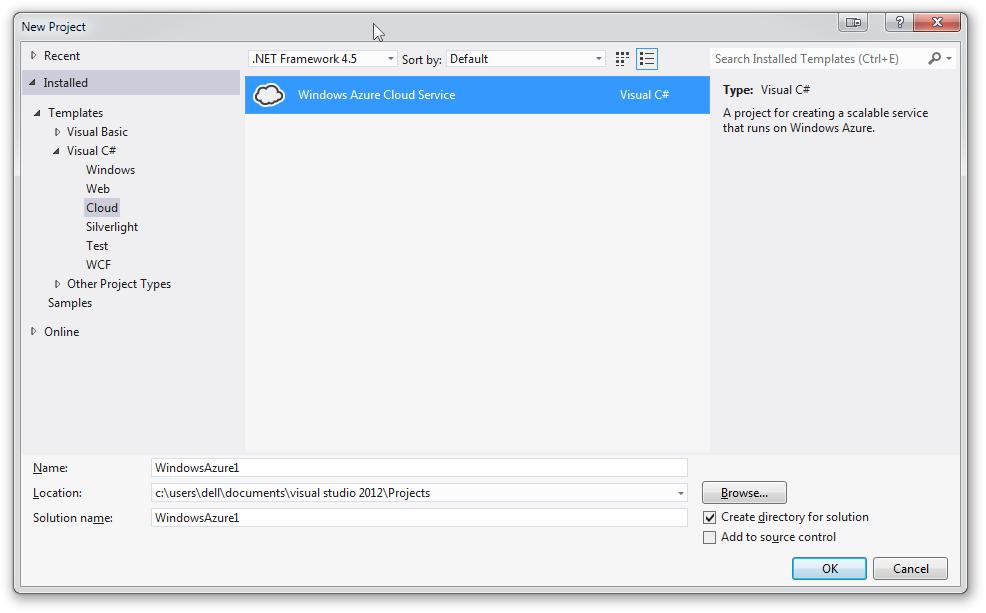
Now we have a Cloud Instance and we need to go code something. As we are dealing with all this leading technology the best example will be to make a .NET MVC web application.
You need to have Visual Studio 2012 Express installed. You will also need Azure SDK for .NET Visual Studio 2012 installed separately.
Lets open up Visual Studio and create a new Project using Cloud Services.
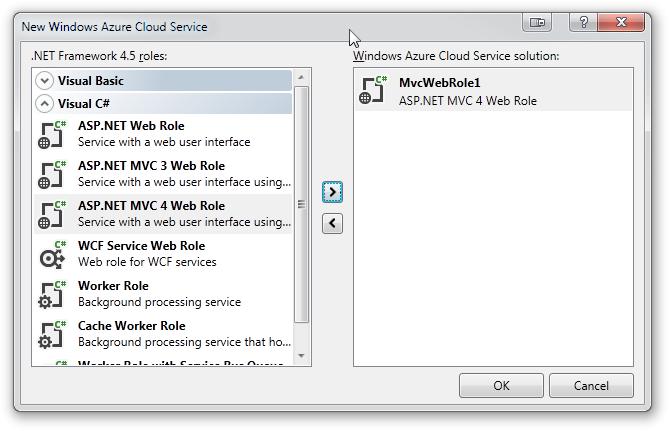
This is a new screen that allows us to select what kind of roles. Lets add a MVC4 Role, click OK and then select Internet Application (Default MVC Project)


Microsoft also has MVA (Microsoft Virtual Academy) which is also free to sign up to. As of writting .NET developers in UK are in high demand and come with highly paid positions. So if you are already here you clearly are trying to decide what to do. I will try to show you how to start using Azure in the simplest way.
First of all you need to grab a Free Trial Account which only takes a few minutes to create. Once you have completed this you need to go to manage.windowsazure.com - That is the "control panel" and we will be using this very often. The first time you will get a quick tour.
With the hype around the Cloud I decided to demonstrate Azure Cloud Services. Daily we use many instances of Cloud Services so it is worth learning about it. With a trial we get 750 compute hours for Cloud Services.(A month free for Small but you get more with Very Small) Here is a quick list of advantages of using Cloud Services.
- You can enable remote desktop login into Server 2012 Cloud Service
- It is fully scalable (from Extra Small to Extra Large)
- You have staging and production environments which can be swtiched instantly.
- Various roles like background workers, MVC Sites, Service Buses and Cache roles, and much more!
The best part is that if you can cross deploy your code. So that means even
though I will be talking Cloud Services you may as well deploy it all to a IIS Website on Server 2012 or a development Virtual Machine instance if you need!
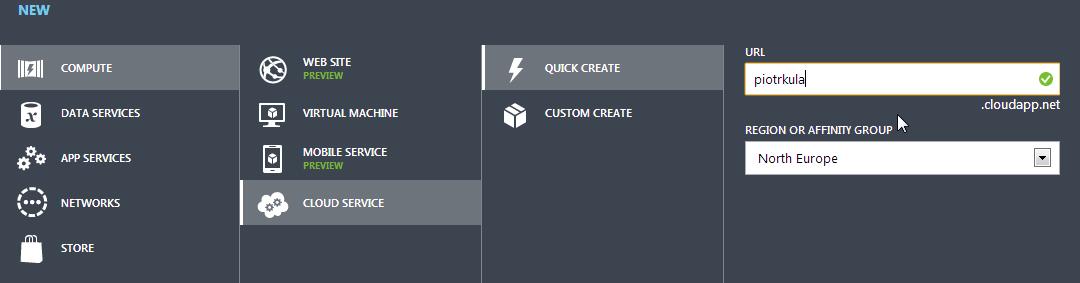
So right after the introduction you will land on a create panel. Click on Compute -> Cloud Service -> Quick Create.
- Enter a URL name
- Select your area- I selected North Europe as I am in the UK and that is the closest to me (But also consider your target audience. Maybe you are making site for a US company. Best make the server in US then)
- Click Create Cloud Service
Now we have a Cloud Instance and we need to go code something. As we are dealing with all this leading technology the best example will be to make a .NET MVC web application.
You need to have Visual Studio 2012 Express installed. You will also need Azure SDK for .NET Visual Studio 2012 installed separately.
Lets open up Visual Studio and create a new Project using Cloud Services.
This is a new screen that allows us to select what kind of roles. Lets add a MVC4 Role, click OK and then select Internet Application (Default MVC Project)
By creating a default MVC Website we will have nice starting
point for common pages and Forms Authorization. In the latest MVC template there are excellent examples embedded into this template. For example ways to integrate into Facebook, MSN, and
Google Open Authentication login.
We
will now see two projects in our Solution. Azure and MVC. One important difference by adding an MVC site as a WebRole presents us with a new Context Menu item on the MVC
Project.

- You can still publish this Project to any other IIS server or Azure Website by using "Publish..."
Lets click on that menu item now and publish this default site to Azure. You will be presented with a Sign In screen. Click in the link on the
left pane and log into your Azure account (if you are already logged in it will just download a file automatically)

A popup will ask you about a Storage Service. Give it a name and select the same region you selected for creating the Cloud
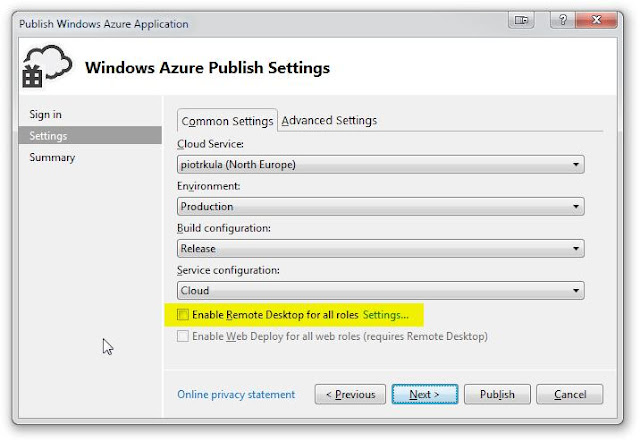
Service. After that is created you will get a settings page. You have allot of setting here but the defaults are OK for now. You now click and enable remote desktop! Enable it and click on settings.
Enter a username and password. (Make sure to use a good password - You can use a program like KeePass to help you store and generate your strong passwords)

Click Publish. It can take
between 5 to 15 minutes to publish. This usually takes longer when you first create a Cloud Service or rescale. You also have the option to publish to a staging environment and when you are happy
that your staging environment is working fine you can switch the staging environment instantly!
Navigate your browser to the your URL once it has been deployed. You now have a MVC Website running on a Cloud
Service.
Now you can Remote
Desktop into this cloud service. Go back in the Azure Management page click on the Instance tab and click on Connect icon found in the footer. A file download will begin. Save it to your
drive and run it.
Click connect, enter your password and click Yes when you get asked about a certificate.

Go ahead and open IIS and you will notice
your website deployed there. You can install and configure almost anything you need on this server and it will persist until you delete it. So even republishing will not re deploy the entire Server
(As it used to do in the early days of Azure) Anything you run that uses CPU will count towards your computing hours so be keep that in mind.
During the UK Tech Days Online (link to on demand videos) I learnt that you can turn off the instances that you do not need and you can save on compute hours. So you an experiment with larger instances turning them on
and off only when you need them. There is also an Azure
Rest API that allows you do everything that the Azure Manager portal does.
You can clearly see that at 13:00 I turned the instance off and
compute hours where no longer logged.

- You have no excuse now but to get over to ASP.NET MVC Website and learn how to easily and quickly create MVC websites.
- You should also head over to Microsoft Virtual Academy and complete some free course.
- You can learn more about Azure with this free course.
I only scratched the surface of capabilities in this article. Azure is packed with features
and there is constant commitment to add more.
:)
Comments